Thursday, March 27, 2014

Superhero Diaper Cake

When my friend/co-worker Luci & I decided to throw our other friend/co-worker Kyle & his wife a Superhero Baby Shower, I started working on putting a diaper cake together.  I know I have said in my other diaper cake posts that it can be difficult to find some of this stuff to match my themes & this theme was certainly no exception.  For the bottom layer, I took a red blanket that was actually one supporting our local university's football team.  I had ordered the cutest blankets that you can see below from the Geekabyebaby Etsy shop.  Unfortunately, they didn't make it until the day after the party, so I had to improvise.  How cute would they have been on a superhero diaper cake?  Oh well.  
Burp Cloth -- Superman Logo Cotton with White Terry Cloth -- Geek-a-bye Baby - Comic Geek - Handmade, Retro DC Comics
Anyway, speaking of Etsy, that is where I found pretty much everything for this diaper cake.  I bought these adorable bibs & this little superhero boy with a "G" on it, which was just perfect for little baby Gavin on the way.  Here is what the bibs & superhero boy looked like.  
Super Baby  Superhero Baby Bib
Backwards Cape Baby Bib
Superman baby bib
Super Hero Boy Plush Doll Personalized with Your Child's Initial (Choice of brown or blonde hair) Eco Friendly

So the bottom layer was the blanket with two of the bibs pinned to the sides.  The middle layer was a yellow receiving blanket I found at I think Target.  I found this little superhero bear on Ebay.  He was just perfect to top off the diaper cake. I put the cape bib on the back of the diaper cake so it would look like the cake's cape flowing off the back.  I pinned the little superhero "G" boy on the front & set two little superhero ducks that were little favors that I think I found for less than a $1 or so at Party City.  I also pinned a couple of little blue socks to the sides.  I finished the cake off with some primary colored ribbon.  I had the red from Christmas, the yellow from the Bee party & the blue from the old Super Bowl party.  Here is the finished diaper cake.  We can only hope that our little superhero Gavin loved it. 


Superhero Baby Shower

One of our friends/co-workers Kyle & his wife were expecting a baby so we decided to give them a baby shower at work.  This presented some difficulty because I have never had a shower or party not at my house, where I could decorate at will.  This was also my first true co-party planning project.  My friend/co-worker Luci also loves planning parties & is totally amazing at it.  We decided to come together & make the work baby shower as awesome as possible, considering we were still going to be at work. : )  

Kyle loves comic books so we decided a Superhero Baby Shower would be appropriate.  I have to show y'all the most amazing backdrop that I cannot take one ounce of credit for.  Luci also happens to be artistic & cut out our city skyline, including our Statehouse grounds where we work.  It then had the baby superhero flying above.  It was so awesome.  She is apparently amazing with an exacto knife.  How incredible is that?  I think I would have cut my finger off.  One day, I only hope to achieve city skyline building skills.  
I can't build a skyline, so I had to stick to my cheeseball making & banner skills.  You can find my cheeseball recipe here.  I made this cheeseball mix the same way, but didn't roll it into a ball.  Instead, I made into the closest shape I could find to a superman shield & put it in the freezer for about half an hour.  I then took it out & cut the edges a little better to make the shield shape.  I also didn't cover it in chili powder like I usually do because I wanted to keep it's light color so you could see the G.  They were naming their little boy Gavin, so I cut up red peppers & used them to outline the shield & make a G in the middle.

For the banner, I wanted to use the superman shield as my "shape".  We had decided to stick to primary colors & use red, blue & yellow for the party colors.  I found an example of a shield online & traced it onto the primary colored cardstock paper that I had bought at Hobby Lobby.  Unlike a lot of my other banners, I didn't use any patterned scrapbook, but just alternated colors instead.  For the edges of the banner & the "shield' in between "Welcome" & "Gavin", I used some comic book pictures that Luci had found online.  Sorry for the awful picture.  Office lighting is pretty terrible.
Luci also printed off these great little signs to put on top of the cupcakes & some super cute tabletoppers.  They have this & a lot of great ideas regarding superhero parties on Pinterest.  Luci also used the same comic book pictures to decoupage the cupcake stand.  They looked awesome. 


Luci also saw this awesome idea on Pinterest.  You take tootsie roll pops & make them little masks & capes.  How cute is that?  It went perfect with our theme.  Of course I had to make a diaper cake for the shower, which you can see on the Superhero Diaper Cake post or on the Diaper Cakes page.  

Pink Diamond Damask Diaper Cake

When I was preparing for the Pink Diamond Damask Baby Shower, of course I had to do a diaper cake.  I wanted the diaper cake to match the theme of the party & I will tell you, damask is not an easy pattern to locate in your normal baby stores.  So to Etsy I went & found a beautiful damask blanket & bibs at the MickeyandGrace Etsy shop.  I bought a link pink baby set at one of the usual baby store suspects & bought the cute pink lamb that went with Baby Girl's bedding set.  

You can see on my Diaper Cakes page how I make the base of pretty much all of my diaper cakes.  I did this diaper cake the same way.  I wrapped the damask baby blanket around the bottom layer & then added in some smaller pink burb clothes on the sides.  I attached everything together using stick pins.  For the second layer, I wrapped a light pink receiving blanket around & attached it & then added the two bibs I had found on Etsy.  I did the top layer with a black & white burp cloth.  I topped off the cake (literally & figuratively) with the sweet little lamp that matched the bedding.  I took some of the ribbon that I had used at the Bee gender reveal party & added in some light pink ribbon.  I also added in a M initial that I had found on clearance before A.C. Moore went out of business.  

I loved how sweet the diaper cake turned out & that it matched the theme of Baby Girl's room.  

Click here to see the Pink Diamond Damask Baby Shower post
Click here to see the Pink Diamond Damask Banner

Pink Diamond Damask Baby Shower Banner

As you saw in the main Pink Diamond Damask Baby Shower post, I went with a light pink & then black & white damask as my main theme.  I just wanted it to be sparkly & girly.  I immediately started working on a banner for the party.  Luckily, I had some black & white scrapbook paper & my ribbons leftover from the Bee gender reveal party a few months before.  I also had some pink scrapbook paper leftover from Addy's nursery.  I went to Hobby Lobby & bought some adhesive rhinestones & adhesive pearls (the same ones I later used for Addy's Pink & Pearl baptism party) to finish up the banner.  I also bought some thin light pink ribbons to put with my black & white ribbons to tie all of the letters together.  

I wanted the banner shapes to be sort of diamond shaped, but not so rigid.  I'm not sure exactly what shape you would call this, but I just played around with it on construction paper until I decided I liked whatever shape that may be.  I cut out enough shapes in the black & pink construction paper & then added in the alternating pink patterned/black & white patterned scrapbook pages that I had cut out in smaller versions of the same shape.  I then used the same letter stencils that I use for pretty much all of my banners in the same color as the construction paper.  

As you can see with most of the banners I make for my parties, I really love to alternate scrapbook papers for the different letters.  I usually alternate colors too, unless I want to keep it very simple, like the one for Addy's baptism party.  I used the adhesive pearls & rhinestones on the tips of my diamond-like shapes.  I just alternated those like I alternated the colors.  I typically group together two different ribbons to tie the letters together & alternate which two ribbons I use, which is what I did for this banner.  I really liked how it turned out, especially the extra pizzazz the pearl & rhinestones added. 
Click here to see the Pink Diamond Damask Baby Shower post
Click here to see the Pink Diamond Damask Diaper Cake


Pink Diamond Damask Baby Shower

When one of my dear friends from law school Ally (the one who can bake the amazing cakes) found out she was having a little girl, I was so excited to have her a shower.  We decided on a weekend in early Fall.  Now we are Southern, so Saturdays in the Fall are dedicated to football.  My husband & I and the majority of our friends all attended the local university, still live only a few miles away & are big fans.  Luckily, our team was playing away so we didn't have to worry about going to the actual game.  We still had to watch our game & the other games too though.  So we decided that a 10 a.m. brunch would be the best way to start the shower.  That way we could enjoy the shower & everyone stay & spend the day watching football...which is what we did.  I think everyone stayed until close to midnight.  We made a day of it for sure.  It was a lot of fun.  

Now you all know I love to pick out a theme for a party.  They had picked out a beautiful nursery set for Baby Girl & I decided to use that as the inspiration.  
We did a great Southern brunch of shrimp & grits (with lots of additional cheeses & bacon/sausage toppings), fruit & dip, quiche, bacon cream cheese crescent rolls (the same delicious ones I told you about from the Super Bowl party, I told you I love them), breakfast casserole, pink lemonade & of course, we had to have dessert.  We enjoyed delicious cupcakes & a Strawberry Oreo cheesecake.  I used the "easy" Philly Oreo Cheesecake recipe found here, but changed it just a little.  I hate making pie crusts.  I'm just not good at them.  So I skipped that step & bought an Oreo pie crust.  Instead of using regular cream cheese, I inserted strawberry cream cheese so it would be pink & delicious.  I also found this amazing creation by Oreo, Berry Burst Ice Cream Oreos.  They were delicious.  So I used those for the 8 Oreos you are supposed to mix into the cheesecake mix.  It was amazing. 
We weren't having a super large crowd, just a small group of close friends, so I kept the table pretty simple.  I had these candle pedestals & found the candleholders at where else?  Hobby Lobby.  The shiny pink one now sits in Addy's nursery & I used it later for Addy's Pink & Pearl Baptism Party.  The sweet frame was pink & white & said "love at first sight" & was also purchased at Hobby Lobby.  I used the damask tablecloth from the "What Will It Be?" gender reveal party & added a light pink tablecloth across the middle.  


Click here to see the Pink Diamond Damask Diaper Cake
Click here to see the Pink Diamond Damask Banner

Pink & Pearl Baptism Party Food Table & Decorations

So you learned all about the Pink & Pearl Baptism banner in the last post.  This is the rest of what went into our sweet girl's baptism party.  I had originally wanted the backdrop to include lacy white & pink hanging paper fans.  However, nothing was the color that I wanted.  It was all wrong.  So I scratched the idea of hanging fans & decided to talk the hubby into making some crosses with some scrap wood he had in his "man-cave/garage".  So he found some regular wood (I think these are 1x4, but I could be completely making that up) & he cut it & made it into a cross.  It was really easy (especially for me, haha) & looked great.  Then I went to paint them & remembered I had no pink paint.  But what did I have?  White paint & red paint.  Perfect.  I had gotten really crazy about the particular color of pink that I wanted everything to be.  Luckily, I was able to make this pretty close.  I think they turned out pretty great, especially for a last minute project the night before the baptism.

For the table itself, here is what the set-up looked like on my dining room table.  Here is another perfect example of my OCDness.  I do this for all of my parties.  I set up my dining room table weeks (ok, once months) in advance & I label on post-its where every dish I am making will go.  If I like the symmetry or set-up of a table & the food I am making won't work in that dish, I will sometimes change what I am making to still be able to use that dish.  Do you see where the "manic" in "Manic Mama Miles" comes from now?  Haha.  So this was the set-up I was originally going with.  You will see in the final pictures that I ditched the little bowls.  I didn't like them & we got the BBQ already with sauce on it, so I didn't need them. 
As I mentioned in the previous post about this party, I am Southern & have tons of pearls in my jewelry box.  I don't wear them as much now, but they were totally the thing when I was in college.  So I used the bracelets & necklaces to decorate the serving dishes.  I also used the necklaces to decorate the two crosses my hubby made.  The little pink candle holder is one that I got for another baby shower that is usually in Addy's room.  It turned out perfect for this party because it even looks like it has a little cross in the front.  


 Next up was the food.  I wanted to keep this simple with BBQ, pimento cheese, rolls, fruit, cheese, pasta salad, potato salad & sweets.  Everything was purchased except for the cupcakes.  Well and I sort of made the pasta salad...by that, I mean I mixed the ingredients in the box with some vegetable oil & the spice pack that it told me to. : )  Which is also pretty much what I did to make the cupcakes.  I love strawberry cupcakes & make them pretty much whenever I can.  So I grabbed a box & some strawberry cream cheese icing from the store & made us some strawberry cupcakes. 
 I wanted these to have a little extra, so I sprinkled some shiny crystalized sugar & added some white sugar pearls. 
 I had honestly thought about trying to make a cake.  Like a real one, but once it got down to crunch time, I backed out.  I had seen a beautiful cake at Publix & decided to just buy it & throw on some sugar pearls. 
 I just added pink sugar pearls all around the cake & then the bigger white sugar pearls around the base & the flower on top. 
I knew I wanted some sort of flowers on the table & I hate buying flowers that are just going to die, so I decided to get hanging plants instead.  I had really, really wanted to buy these beautiful dwarf peach trees that had pink blooms, but they were expensive & were also a little tall for my table set-up.  So I went with my $5 hanging plants. 
 I definitely woke up at 4:30 a.m. the morning of the party freaking out because I had overlooked the hanging plants being in brown planters.  So by 7 a.m., I was out in the garage painting (yes painting) the planters.  I was obviously still a little out of it because they were a little streaky, but party guests said they thought they were "distressed".  Haha.  Nope, but hey, whatever.  They worked.  Here is what everything looked like on the table.  The backdrop was a big white tablecloth that I hung up.  There are actually two tablecloths on the table, since these weren't really the right sizes for the table.  I was originally going with a pink tablecloth, but none of 3 or 4 I had were the right color pink.  So I went with white & I think it worked with the lacy theme. 

 One thing I wish I had set up a little differently was the cross below the cake.  I stuck it on the bottom tier of the cake stand because the cake had a flower on top.  In hindsight, I think it would have looked better had I just stuck it on top of the flower & had it sitting up on top of the cake.  Oh well.  Anyway, the party turned out very nice.  We had a lot of wonderful family & friends come support us & our sweet Addy girl & it was a truly beautiful afternoon. 

Pink & Pearl Baptism Party Banner

So our sweet girl was baptized & we had our amazing friends & family over to celebrate after the service.  I wanted to keep this simple, but that is pretty difficult for me.  I wanted to at least keep the theme simple, so I went with pink & pearls with a little lace thrown in.  I am Southern, so I have pearls a plenty.  I didn't have to do a whole lot of purchasing in that department.  The first project that I tackled was making the banner.  I had this pack of 18 round doilies that I had bought at the Dollar Tree for $1.  I had bought them for another party & just never used them.  So I decided I would use them as the base for my banner. 
I went to my craft drawers & searched until I found as many light pink pieces of scrapbook paper that I had left from my other parties.  We were in project "pay off credit card" mode at this point, so I really wanted to save money where I could, even if scrapbook paper is only like 40-60 cents a piece.  Luckily, I save all of my scrapbook "scraps" from leftover projects & had just enough to cut out the circles that I needed.  I have a Martha Stewart circle cutter & let me tell you, that thing is no joke.  When I first got it, I wanted to see how well it worked.  Well, I missed the part where it said to use some sort of glass cutting board (sold separately of course).  So I stacked up some file folders & the paper I wanted to cut & cut a circle...through the paper, through the file folders & into my desk.  Whoops.  Luckily a furniture stain pen helped the desk out, but lesson learned.  I still haven't bought the special board & just use my cutting boards.  Anyway, I used the biggest setting & cut out 6 inch circles. 
Something I did purchase especially for this party (mostly because I found a 40% Michael coupon & wanted to put it to good use) was the Martha Stewart Circle Edge Punch Starter Kit.  This included a doily punch cartridge, which I thought would be perfect.  Now here is where I ran into a small problem.  My circle cutter cuts circles up to 6 inches in diameter.  My circle edge punch starts at 6 inch circles & bigger.  So my circles were pretty close & some of the edges as you can see in this bottom picture didn't turn out perfect.  However, hanging up on the wall, you couldn't really tell that much. 

Look how cool this thing is.  You literally punch & then rotate it to the next spot & punch again, all the way around.
Once I had all of my circles punched, I glued them to my Dollar Tree doilies & started working on the letters.  I used the same letter stencils that I used to make the Bee party banners & traced out "God Bless Addy". 

I had some adhesive pearls leftover from a baby shower that I will post about soon & so I used those to decorate around the letters.  I strung the letters together using the clear cord that I used for the Baby Mobile and that I use to hang the other party banners, paper fans, etc.   I'm telling you, the stuff is great & so multi-functional.
I do mock set-ups of my parties.  Here is the backdrop set up in my dining room to make sure that everything would be positioned in the right place.  What did I tell you?  I'm so OCD.  : ) 
Here is a shot of the banner hanging in the tent.  I hung this up in the tent the same way I strung the letters together, by using my clear cord & tying up the edges to the top of the tent rails.  It was a little windy that day, so I also took some shipping tape, rolled it up & stuck each individual letter to the backdrop to keep it a little more secure. 

And a picture of the whole table.  You can see more about the Pink & Pearl Baptism Party Food Table & Decorations here. : )


Super Bowl - Throwback Thursday

This is a throwback to the first Super Bowl that broke my heart.  I am a Peyton Manning fan & this year, my husband & I took a trip to NYC to see Peyton & the Broncos play the Seahawks in the Super Bowl.  We were engaged in NYC back in 2008 & thought that going back to celebrate an early 5 year anniversary, an early babymoon & a really early 30th birthday for me would be a great idea.  So we pulled out the trusty credit card with 0% interest for a year & away we went.  What a nightmare.  It went terrible.  The trip was great, the experience was great, the game was just awful.  To top it off, we got snowed in at the airport & had to sleep there.  Ugh.  But this post isn't about this past Super Bowl, it's about Super Bowl XLIV from 2010.  Peyton was still with the Colts then & they were playing the Saints.  I was having my first big Super Bowl party at our old house.  I spent what felt like forever cutting out horseshoes & fleur de lis.  Let me tell you, there are few things that are more of a pain to cut out than fleur de lis.  I traced tons of them from a template I found online which was fine, but they have so many edges that it took quite a while to cut them out.  I cut the horseshoes out in Colts colors of silver & blue & I cut the fleur de lis out in Saints colors of black & gold.  I then went a little glitter crazy.  I covered all of the shapes in Elmer's adhesive spray & then glittered like crazy.  I alternated the colored shapes with footballs & tied them onto streamers & strung them across our den.  My horseshoes didn't want to stand up straight...which was probably a little foreshadowing of what was to come.
 
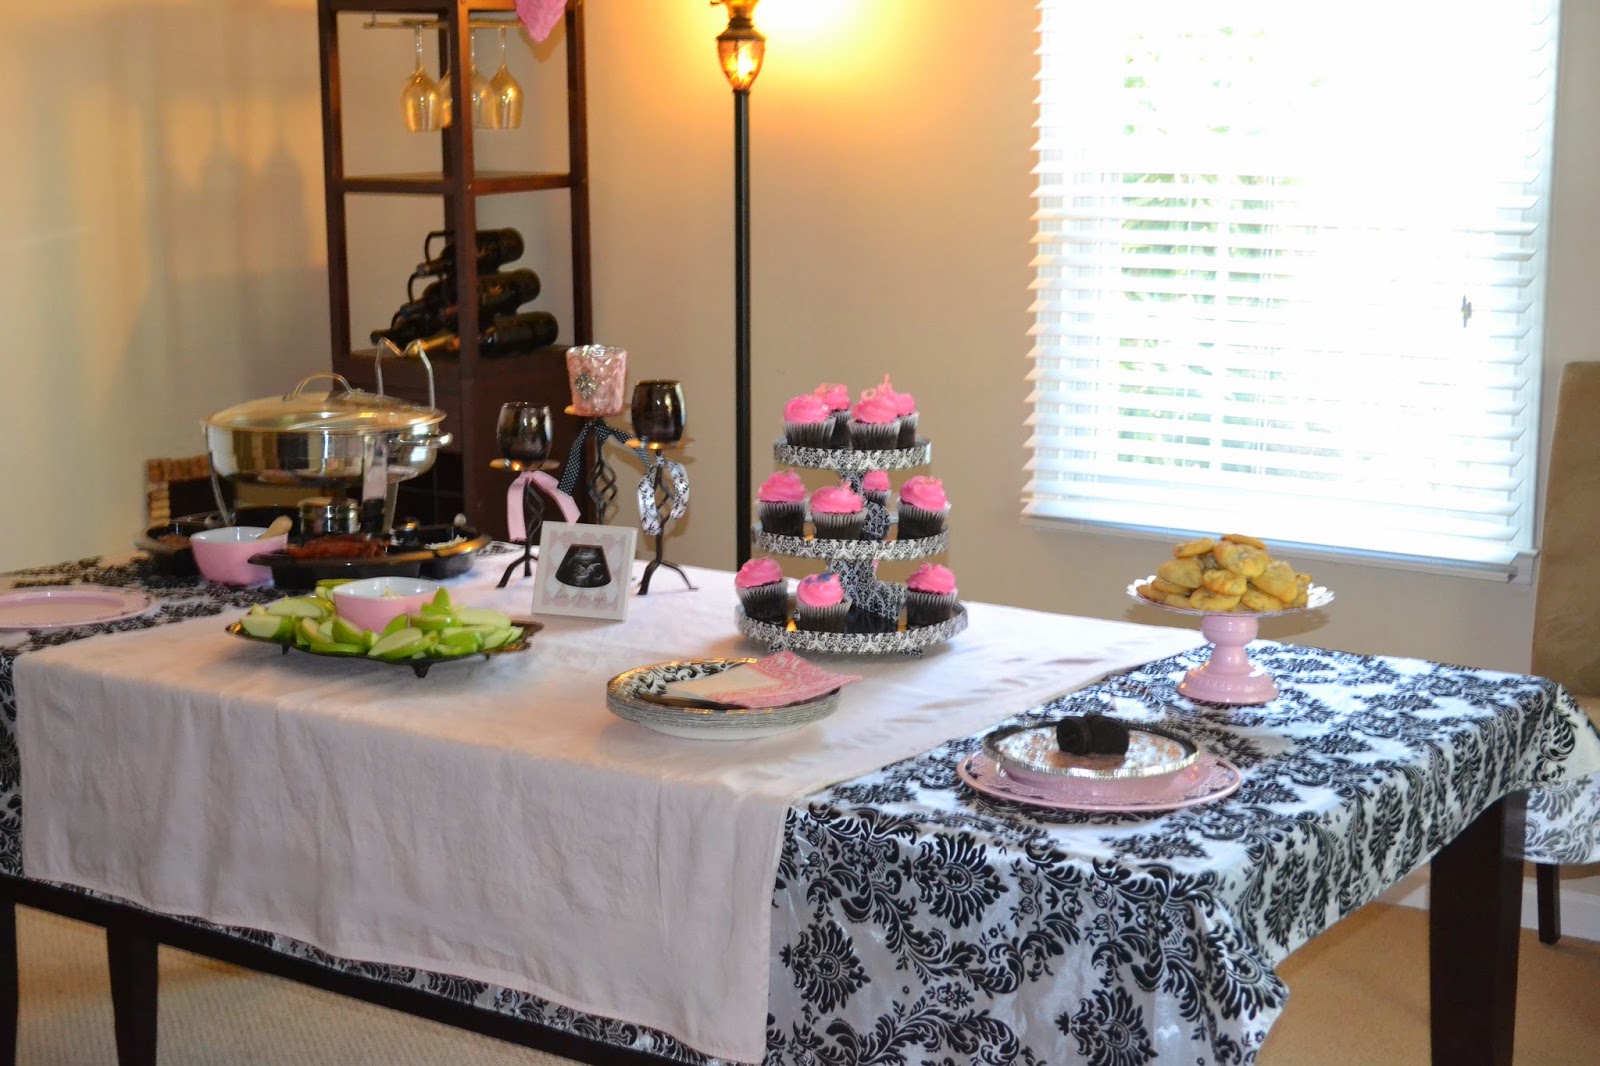
I set up all of the food in the dining room.  I divided the dining room table into two sides...the blue/silver side for the Colts & the black/gold side for the Saints. 

 This was when I was just getting started in my obsession with theme parties, so it was a work in progress.  I did, however, try & give the food clever names & make them either football or team related.  Here is the food that was on the Saints side.

 
Most of this food was super easy.  The "Spicy Saints Salsa" was delicious salsa from Publix.  The "French Quarter Footballs" was just dough cut into football shapes & topped with pizza sauce & mozzarella cheese.  The football cake was also picked up from Publix.  The "Cajun Cheeseball" is my usual cheeseball recipe that you can find here, shaped into a football shape.  To make it a little more spicy, I added in some cayenne pepper into the cheeseball mix.  The lines in the football, which got a little messy, were just pieces of cream cheese that I had stuck in the freezer for a few minutes to try & get them to harden into that shape.  Keeping the chili powder off of the clean white stripes was pretty impossible. 
 
Now for the Colts side of the table...

The top picture is missing the "Colts Bacon Crescents" for some reason, but for a lot of these parties, I just take the pictures when I can because there is always so much cooking & last minute decorating & greeting going on.  I need to focus more on taking some decent pics, but back in 2010, I never even considered I would be posting these pics to a blog.  : )
 
So on the Colts side...the "Super Bowl Sausage Dip"...this is so easy & probably every single one of you has made it before.  It is your basic Velveeta Spicy Sausage Dip, recipe can be found here.  The only change I made is that I typically don't ever have Rotel around, but will have jars of salsa.  I just used the salsa instead of the Rotel & I think it tastes just as delicious.  We do use the "hot sausage" to make the dip & it is DELICIOUS.  This is pretty much a staple for any tailgate/football party. 
 
The "Colts Bacon Crescents" is also one of my favorite recipes for tailgate, parties, breakfast, Saturday, really whatever.  When bacon & cream cheese is involved, you really can't go wrong.  Here is the recipe from Kraft.  I pretty much always double the recipe because this is the first thing that gets gone at parties.  Everyone loves them.  It was definitely the same at the Super Bowl party.  It was the most action from the "Colts" all night. : )
 
The "Manning MVP Meatballs" are my standard meatball recipe that you can find 
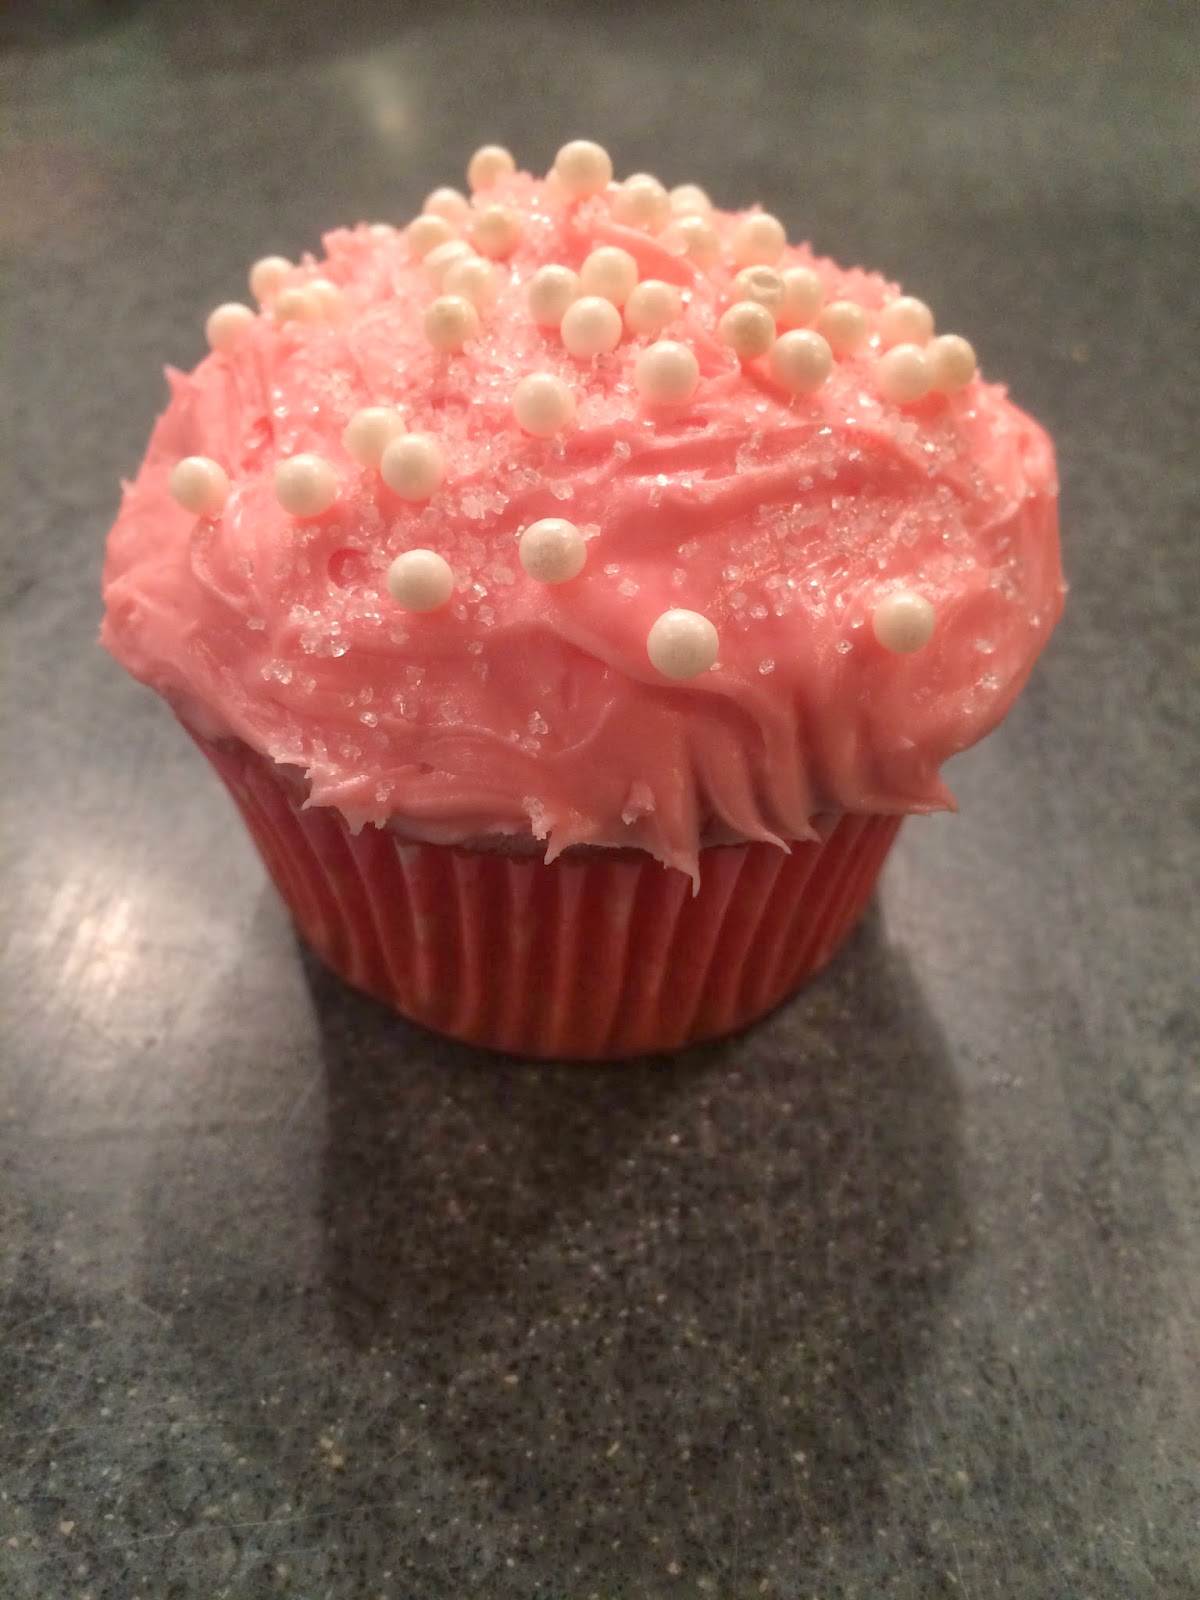
here.  These are also pretty popular & very delicious.  In the middle of the table, I just had cookies that were supposed to be football shaped with either blue or black sprinkles for each of the teams.  Full disclosure, they kinda baked like regular cookies & not footballs, but what are you gonna do? 
 
For decorations, I used tablecloths, party picks, the paper football,  & confetti from Party City.  I had the black & gold plates/napkins/silverware from a previous Casino party & picked up the rest from the Dollar Tree.  The Dollar Tree has amazing prices on tablecloths & plates & napkins & stuff, if they have the color you are looking for.  Their colors are pretty basic, although around New Years, they do bring in the gold & silver, which is great to snag & hang on to.  For the two boxes saying "Saints" & "Colts", I took two boxes that I had around the house, I think they were cereal boxes or something, & I covered them in some foil paper I had leftover from Christmas gift bags.  Then I just glued on my construction paper cutouts & I was done. 
 
The party turned out great, if only the game had.  Sadly, Peyton & the Colts wound up losing.  But at least we had an awesome party with awesome friends to distract me from my sadness.  Maybe one day Peyton can win a Super Bowl again.  Fingers crossed.